|
|
Loading Pictures
At the bottom of this page of the wizard is a checkbox labeled "Use beginner mode menus." which is checked by default. If you are just getting
started with Morpheus Photo Animation Suite it is recommended that you leave this box checked which will simply hide some of the more advanced menu options and toolbar
buttons. Only the basic buttons needed to familiarize yourself with getting started will be shown. Later, when you are more familiar with Morpheus Photo Animation Suite
you can turn this option off and use the normal mode menus in order to gain access to all of the available features.
Once you have loaded your pictures, simply click the Next button again. On the final page of the wizard are some basic
instructions for getting started, which will summarize similar instructions as found in this tutorial. Once you click the Finish button, the
directions from the last page of the wizard will still be shown in a smaller pane off to the side.
|
| Copyright © 1999 - 2026 Morpheus Development, LLC. All Rights Reserved Privacy - Purchase Terms |
 Start Morpheus Photo Animation Suite by clicking on the icon, either on your desktop, or in the Start menu.
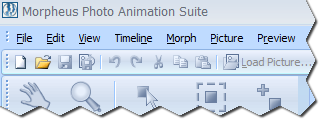
If you are in the right program, the corner of the screen should resemble this picture.
Start Morpheus Photo Animation Suite by clicking on the icon, either on your desktop, or in the Start menu.
If you are in the right program, the corner of the screen should resemble this picture.
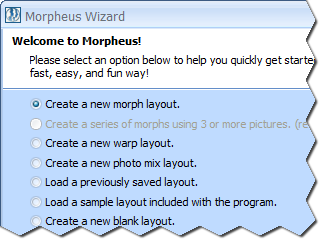 You should see the Layout Wizard when you first start Morpheus Photo Animation Suite. If you have disabled the wizard or closed it, you can select Layout Wizard from
the File menu to start it again. In this tutorial, we will create a simple morph, so select "Create a new morph layout." from the first page of
the wizard, then press the Next button to continue.
You should see the Layout Wizard when you first start Morpheus Photo Animation Suite. If you have disabled the wizard or closed it, you can select Layout Wizard from
the File menu to start it again. In this tutorial, we will create a simple morph, so select "Create a new morph layout." from the first page of
the wizard, then press the Next button to continue.
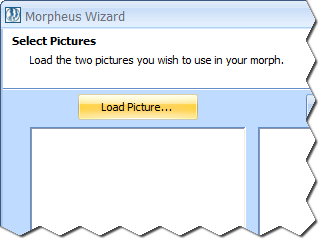 On the second page of the wizard, you will load the two pictures you wish to use in your morph. Click the
Load Picture buttons above the picture preview boxes to select the
picture file you want to load.
Select the picture file that you want to morph from for the box on the left, and the picture file that you want to morph to
for the box on the right.
On the second page of the wizard, you will load the two pictures you wish to use in your morph. Click the
Load Picture buttons above the picture preview boxes to select the
picture file you want to load.
Select the picture file that you want to morph from for the box on the left, and the picture file that you want to morph to
for the box on the right.
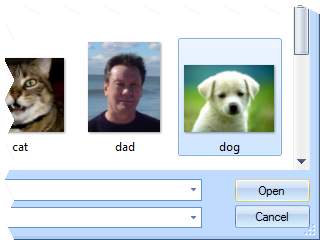 In this example, the "dog.jpg" sample image (which comes
included with Morpheus Photo Animation Suite for demonstration purposes) will serve as
the starting picture.
Once the file is selected and opened, the picture will appear in the picture preview box below the Load Picture button.
Load the second picture using the button on the right in the same manner. For this example, the
"Alana.jpg" sample image will be used.
In this example, the "dog.jpg" sample image (which comes
included with Morpheus Photo Animation Suite for demonstration purposes) will serve as
the starting picture.
Once the file is selected and opened, the picture will appear in the picture preview box below the Load Picture button.
Load the second picture using the button on the right in the same manner. For this example, the
"Alana.jpg" sample image will be used.