Resizing the Picture
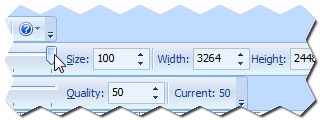 The first important step to optimizing your picture is to resize it so that it will fit
on your screen. To do this, you will use the Picture Size toolbar, which you can see in
this picture. The only control you need to use is the slider bar on the left side of the
toolbar. There are two toolbars with slider bars, and the Picture Size toolbar is the top one
of the two. Moving this slider bar allow you to resize your picture anywhere from 1% to 100% of its original
size, just by sliding the bar left or right.
The first important step to optimizing your picture is to resize it so that it will fit
on your screen. To do this, you will use the Picture Size toolbar, which you can see in
this picture. The only control you need to use is the slider bar on the left side of the
toolbar. There are two toolbars with slider bars, and the Picture Size toolbar is the top one
of the two. Moving this slider bar allow you to resize your picture anywhere from 1% to 100% of its original
size, just by sliding the bar left or right.
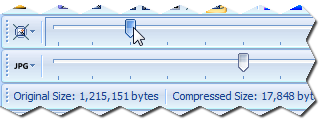 Start out by sliding the bar down to 20 (The 3rd tickmark on the bar), as shown here.
 A setting of 20 allows you to see most of the picture in the example screenshot here.
You will most likely be able to see the entire picture on your screen, depending on your monitor resolution and the original dimensions of
the picture you loaded. Keep in mind that other people may have smaller monitors than you, so you may want to go a little bit smaller if you know
that you have a large monitor.
A setting of 20 allows you to see most of the picture in the example screenshot here.
You will most likely be able to see the entire picture on your screen, depending on your monitor resolution and the original dimensions of
the picture you loaded. Keep in mind that other people may have smaller monitors than you, so you may want to go a little bit smaller if you know
that you have a large monitor.
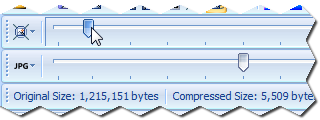 We are going to try a setting of 9 next, since 20 didn't quite fit in the example window. You may want to leave the size at
20, or maybe try a larger size, depending on how big your picture appears on your monitor.
We are going to try a setting of 9 next, since 20 didn't quite fit in the example window. You may want to leave the size at
20, or maybe try a larger size, depending on how big your picture appears on your monitor.
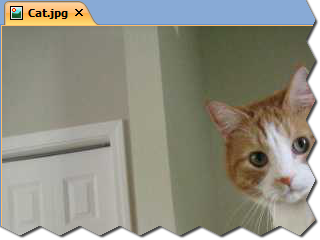
 A size of 9 fits the entire image in the sample window here. The tutorial will continue to use 9,
but you can select whatever size appears best on your monitor if you want.
A size of 9 fits the entire image in the sample window here. The tutorial will continue to use 9,
but you can select whatever size appears best on your monitor if you want.